

Pixelated Joji Edit in DaVinci Resolve- Episode 6

Welcome Editors to this Special Edition!
This week's issue comes straight from the Halloween Twitch stream where we dove deep into recreating viral video editing effects inspired by Joji's "Pixelated Kisses" aesthetic! This hands-on session walked through analyzing multiple Instagram and TikTok effects, eventually focusing on recreating the glitchy, high-contrast, red-channel heavy style using pumpkin carving footage.
The goal? To master the distorted, cinematic editing techniques that make scrollers stop and create Halloween content with that viral aesthetic.
If you've ever wanted to understand how to break down viral effects and recreate them from scratch, this is your comprehensive guide.
Quick Update: Streams continue on Saturdays and Sundays from 4-6pm AEST. This Halloween special focused on effect analysis and the beginning stages of recreation in DaVinci Resolve.
Let's break down what we covered!
Let's cut the Assembly!
This Week's Live Breakdown
The stream started by reviewing multiple effect ideas from the Discord thread, including:
Effect Options Analyzed:
Zoom In Effect - Dynamic camera zooms into scenes
Water Split/Ripple Effect - The "boat effect" with water ripples
Apple Folder (Joji Pixelated Kisses style) - The red channel, glitchy aesthetic
Pop-Out Effect - Cutout masking with elements popping from the frame
"Let That Sink In" Effect - Dramatic reveal transitions
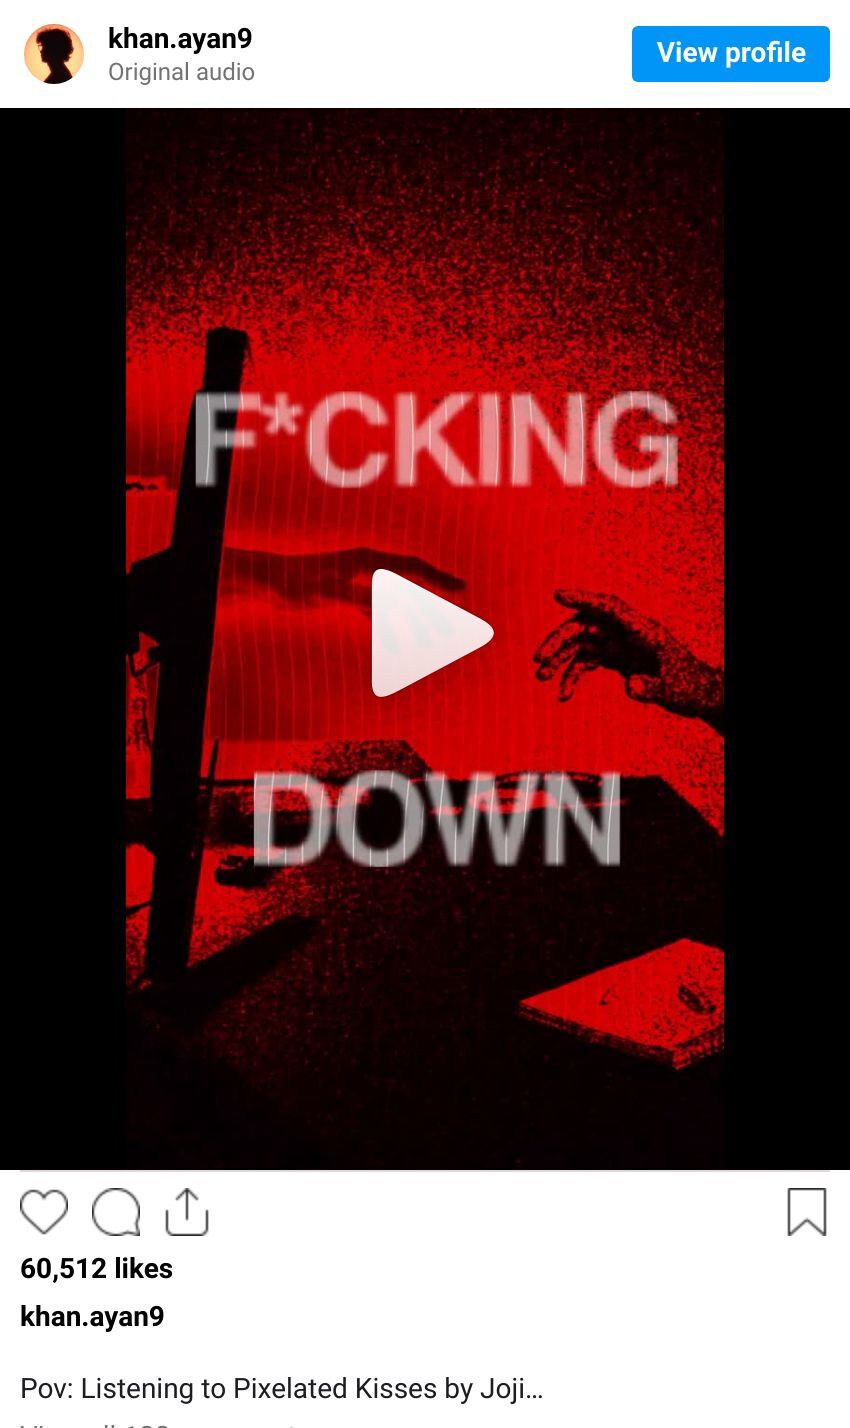
After analysis, we chose the Joji "Pixelated Kisses" effect for its Halloween-appropriate moody aesthetic.:
Visual Effects Identified:
Heavy red channel/color grading (compared to Nintendo Virtual Boy aesthetic)
CRT scanline effects
Denoising and grain for texture
Text with difference blend modes and warping
Speed ramping (not "revamping" as initially said!)
Cloning effects with multiple exposures
Reverse clips for dramatic transitions
Masking to isolate and grade specific elements
Grid effects overlaying footage
Floating/levitation effects on text
1. COLOR GRADING: The Red Channel Foundation
What we discovered:
The entire aesthetic is built on extreme color grading that emphasizes reds while crushing blacks and whites. It's reminiscent of the Nintendo Virtual Boy - everything viewed through red-tinted glass.

The approach discussed:
Start with the Color page in DaVinci Resolve
Use Color Slice to isolate and enhance the red channel
Apply the Qualifier to mask specific areas (like hands)
Drop exposure selectively while keeping other areas bright
Boost contrast heavily
The whites should be overexposed intentionally
Key Quote from Stream: "Everything is in like this red channel and like just everything is in the high contrast... It's the same! [as Virtual Boy]"
2. CRT & GRID EFFECTS: The Retro Overlay
The technique:
Adding CRT monitor effects and grid overlays creates that glitchy, digital aesthetic that makes the footage feel like it's being viewed through old technology.
Discussion points:

Key Insight: I’ve found Fusion plugins by @Akascape called super modulation aswell as other plugins by him. That also help with this CRT Effect. And they are free : )
CRT effect available in DaVinci Resolve's OpenFX
Grid effects can be layered on top
These effects work together with the red color grading
Creates visual texture and movement
3. TEXT TREATMENT: Warped & Distorted
Text isn't clean in these edits - it uses difference blend modes and warping to feel unstable and glitchy.
Using Fusion in DaVinci Resolve:
Add Text+ node in Fusion page
Apply difference blend mode for distorted look
Add warping effects for instability
Apply the same red/high-contrast treatment as footage
Keep text minimal and impactful

Stream insight: "I like the subtlety of the text" - it should integrate with the aesthetic, not overpower it.
4. SPEED RAMPING: Rhythm & Flow
The attention-grabbing technique:
Speed ramping creates dynamic motion and matches the emotional rhythm of your audio.
How to create it:
Go to speed tools in DaVinci Resolve
Use reverse clips for dramatic moments
Match speed changes to audio beats
Creates movement even with static footage

Important clarification from stream: "It's called speed ramping, not fucking revamping" - now you know the proper term!
5. CLONING EFFECT: Multiple Exposures
The technique:
Creating ghostly duplicates or after-images adds otherworldly energy perfect for Halloween content.
Application discussed:
Duplicate clips on multiple layers
Offset timing between duplicates
Apply blend modes
Creates surreal, otherworldly feeling
Particularly effective for the Halloween aesthetic

Why it works: Makes static shots feel dynamic and adds that supernatural vibe.
Watch the Full Recording - Twitch VOD Here!
The Creative Process: From Analysis to Execution
Phase 1: Idea Selection
Started with Discord suggestions from Harmony, including:
How to carve a pumpkin the right way
Houses that give out fruit gone wrong
Top 10 best tricks for trick-or-treaters
Decision: "You know what? Fuck it. Let's do the carve a pumpkin with Joji one even further."
Phase 2: Reference Analysis
Watched reference video multiple times
Took screenshots of key frames
Created effect breakdown list
Compared to other references (Virtual Boy, Monsters Inc)

Phase 3: Footage Gathering
Searched YouTube for pumpkin carving footage
Selected Martha Stewart pumpkin carving video
Downloaded reference Joji video for frame-by-frame analysis
Phase 4: Recreation Begins
Imported footage into DaVinci Resolve
Set up 9:16 format for vertical video
Applied initial color grading
Started cutting to music rhythm
"Unintentionally went hard with this... The timing of that! And that was unintentional, bro!"
To further delve into the Smii7y Editing style, look towards the Editor himself!
The Toolkit: From Live Stream to Your Project
Theory is nothing without practice. Here's how we bridge that gap.
FOR ALL READERS (Free Tier):
The Analysis: This entire write-up is your breakdown of the technique.
The Replication Guide: The step-by-step Davinci Resolve process outlined above is your starter kit.
COMING SOON FOR PAID SUBSCRIBERS (The Hands-On Toolkit):
For creators who want to go beyond reading and start doing, a premium subscription will unlock:
The DaVinci Resolve Project File: The actual timeline from my live stream with ready to use Fusion templates.
The Asset Library: The specific clips and audio file used from projects.
The Full Video Walkthrough: An edited, clear version of the step by step process.
PDF : An written step by step guide to refer back to.
This is for those who don't just want to watch, they want to build.
The Value: Understanding the Architecture
This session demonstrated the complete effect recreation process:
Analysis - Breaking down what makes viral effects work
Selection - Choosing which techniques to focus on
Preparation - Gathering assets and references
Execution - Beginning the actual recreation
Iteration - Adjusting and refining as you go
These techniques work because they:
Create visual tension through distortion and color
Build atmosphere with consistent aesthetic choices
Guide emotion through speed manipulation
Stand out in social feeds with bold visuals
The beauty of mastering these fundamentals is their adaptability. Once you understand the blueprint, you can create Halloween content, music video aesthetics, or any moody, atmospheric edit.
What's Next?
Project Status: "The finished video will be out hopefully early next week. We got the color right and then we need to fix the text a little bit."
Remaining Work:
Text refinement and font selection
Opacity adjustments
Position tweaks
Final timing to audio
Keep practicing these techniques and building your effect library. The more you understand these mechanics, the faster you can recreate viral aesthetics.
Remember: Your first assembly is about structure and rhythm. Get the timing right, then polish the visual details.

Until next time, embrace the chaos and start editing something stupid.
Join the Discord for more technique breakdowns and check out the stream VODs!
~Sniv